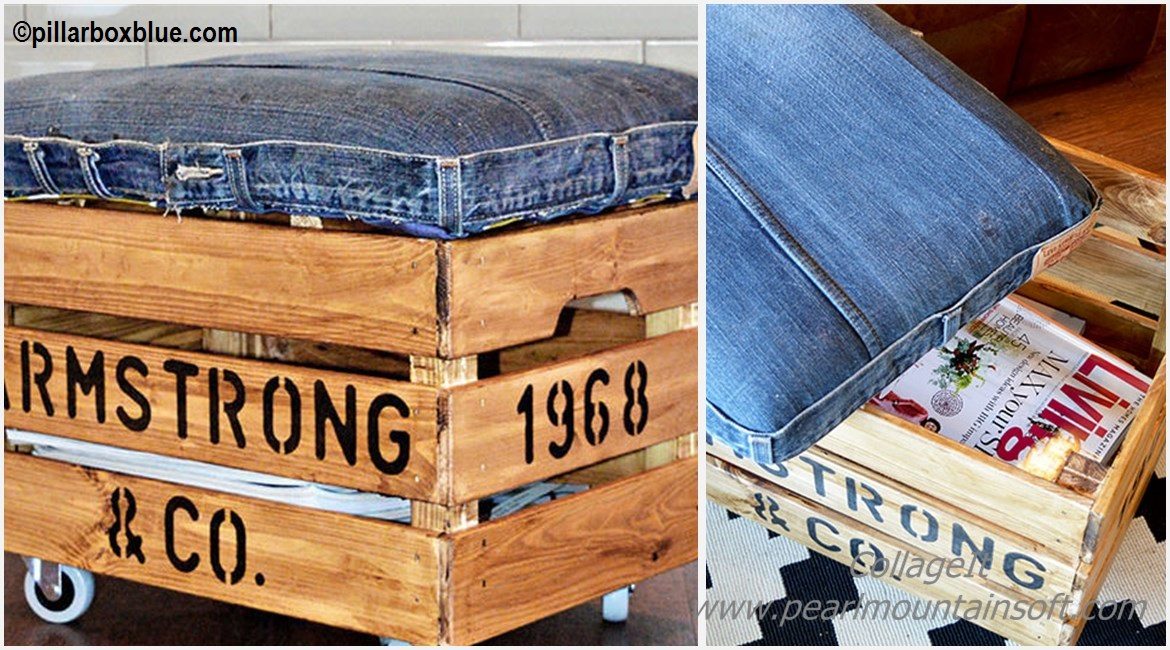
A cool and practical idea – we loved this DIY Denim Otoman Ikea Tutorial! Just take a look at the wheels – you can position the otoman wherever you want without any effort. Also change it’s location as often as you fancy.
Keep reading and see for yourself! The first step is to get the needed tools and materials and then start working.
What you need:
– Wooden Crate
– IKEA RILL casters
– Dark wood wax
– Letter/number stencils 2″ high
– Sharpie Pen
– Old pair of Jeans
– Scrap fabric same size as the the lid
– Fabric glue
– Chipboard/plywood big enough to fit the top of the crate. Plus some scraps of wood for batons approx 2″ x 2″ and 12″ long.
– Upholstery foam for the top approx 2″ thick
– Spray adhesive
– Batting/wadding
– Staple gun
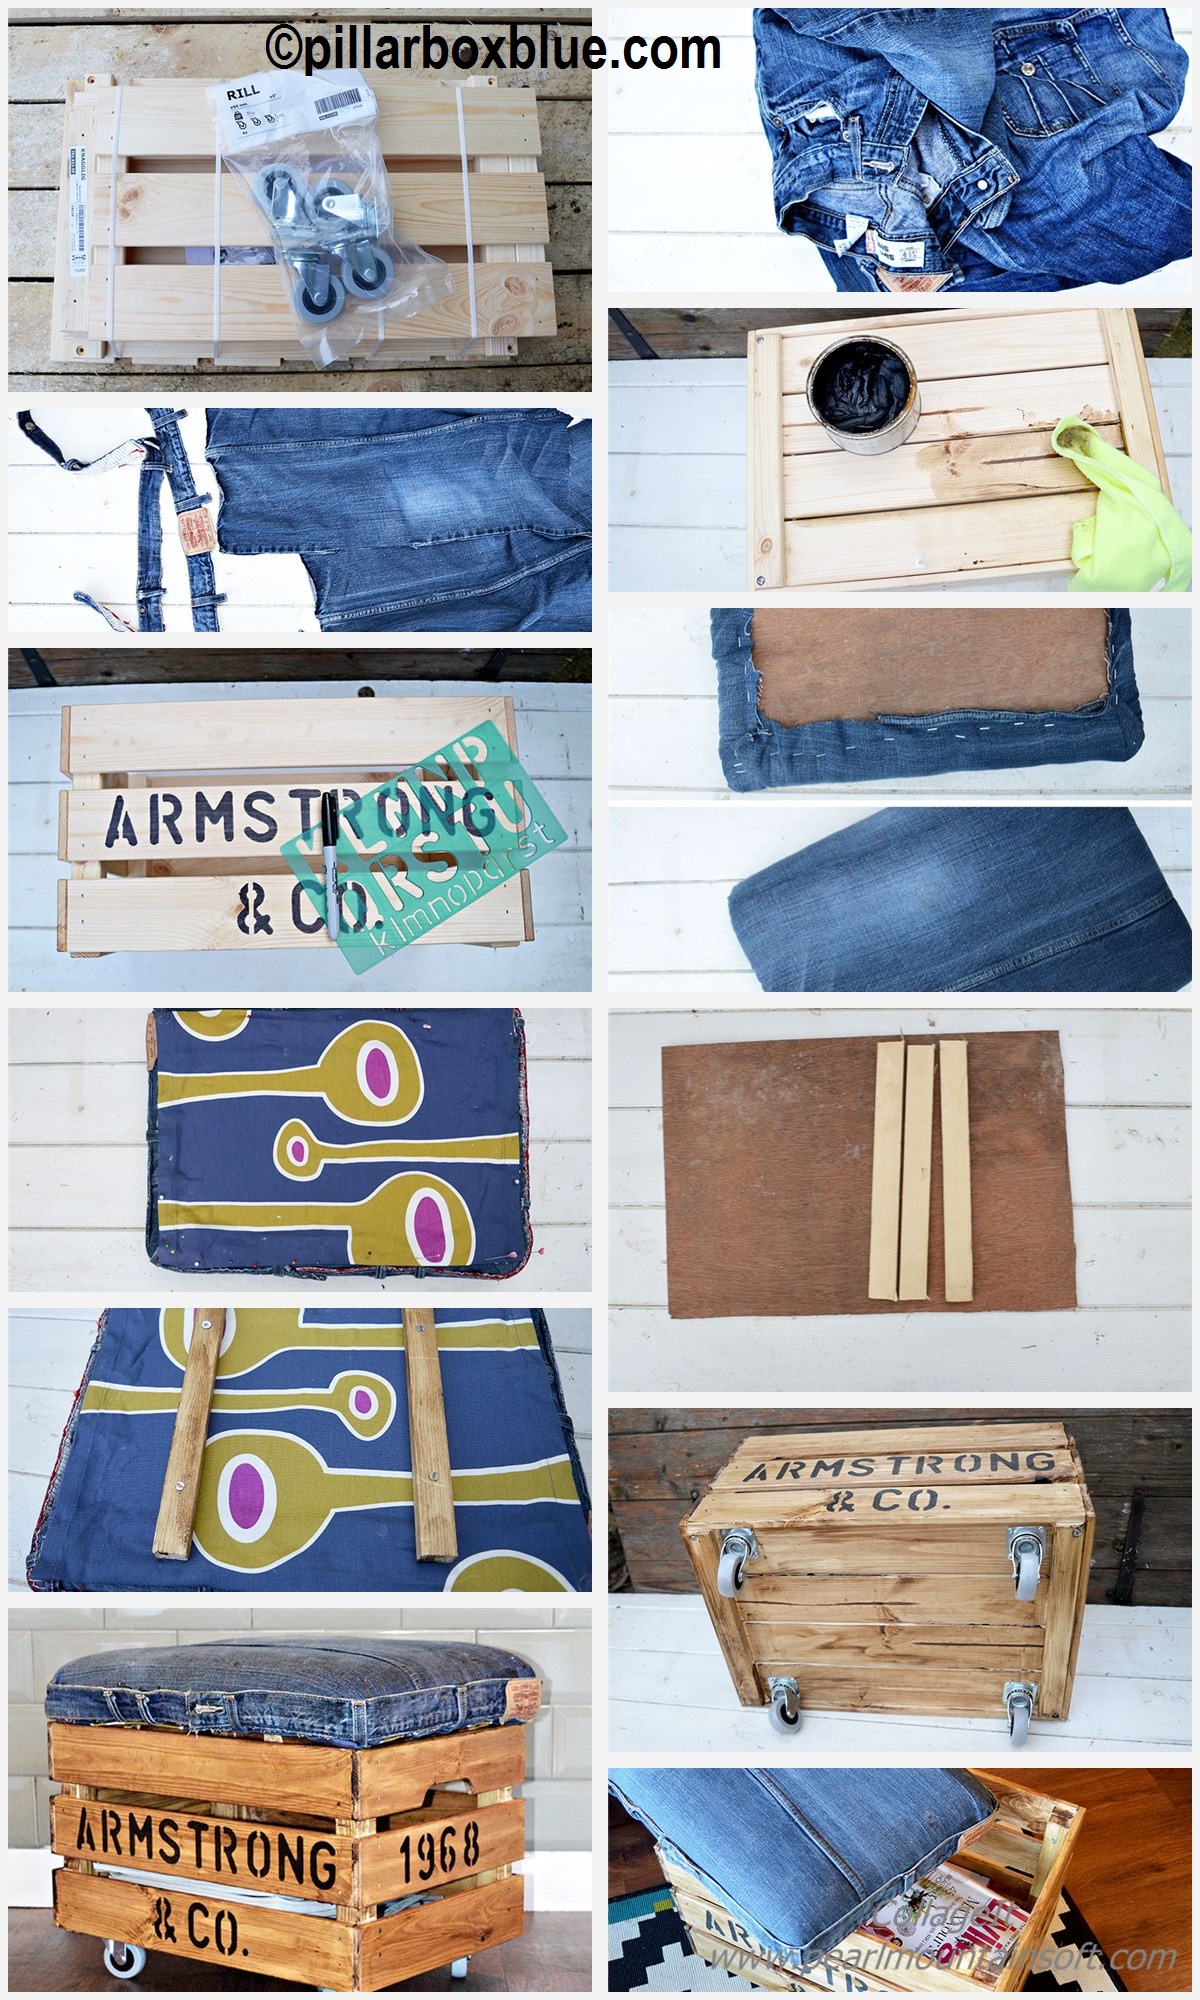
How to do the job:
(all images by pillarboxblue.com)
For the full tutorial go to pillarboxblue.com
Are you ready? How hard was it? We’d love to hear about your craft results – just leave a comment with your opinion below.
